Tricks using Visual Watermark
Apart from putting a copyright on protected photographs Watermarks can be used to file-name consecutive images into separate folders with and without an identity. This will produce two images with the same file-name in different folders, one watermarked and one not watermarked. This is very useful when using images in a slideshow, where one image is for display, whilst the other is kept watermark free but with the same file name.
In the following steps we use the basic version of Visual Watermark to :-
In the following steps we use the basic version of Visual Watermark to :-
- Mark and identify images with a folder and image number
- Save marked and identified images with a new consecutive file number
- Save original images with a new consecutive file number
FOLDER STRUCTURE
To do this you will need three folders for each group of photographs. Name the folders :-
- 'FOLDER A Original'
- 'FOLDER A Watermarked'
- 'FOLDER A File-Name Originals'

Group each set of folders into one single folder with the same name.
WATERMARKING IMAGES
STEPS
- Organise into 'FOLDER A Originals' the images into the sequence that you want them uploaded
- Drag or upload the images from 'FOLDER A Originals' into Visual Watermark (FIG 1), click next step
- Click on Add Text (FIG 2), next step

FIG 1 - Upload the images into Visual Watermark

FIG 2 - Add Text
4. Move the sample text to desired location (FIG 3)
5. Select Font, keep it simple e.g. Arial (FIG 3) Text size has been exaggerated for display.
6. Colour should be kept white (FIG 3)
5. Select Font, keep it simple e.g. Arial (FIG 3) Text size has been exaggerated for display.
6. Colour should be kept white (FIG 3)
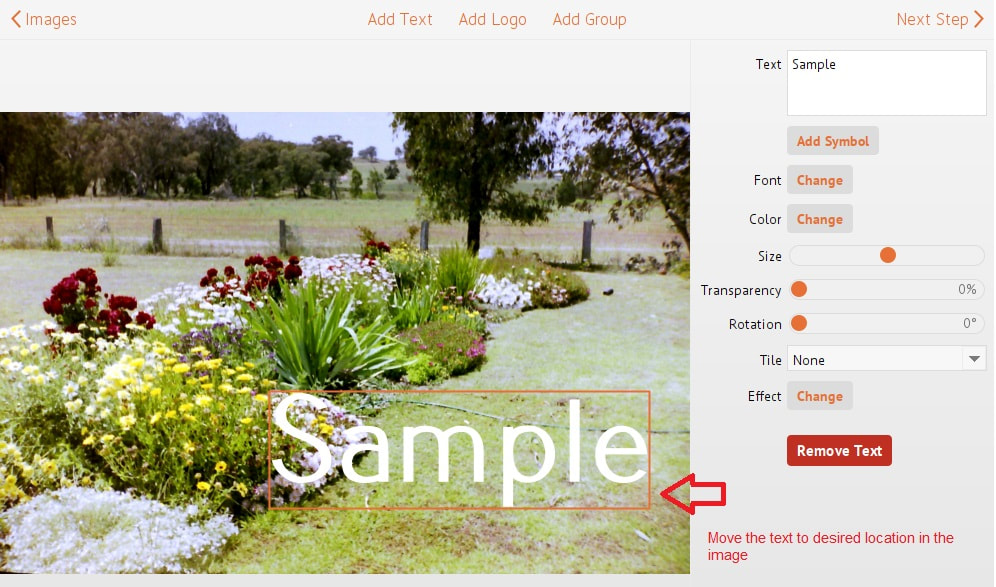
FIG 3 - Move text to desired location (text size exaggerated for display)
7. Add Symbol, select Image Number (FIG 4)
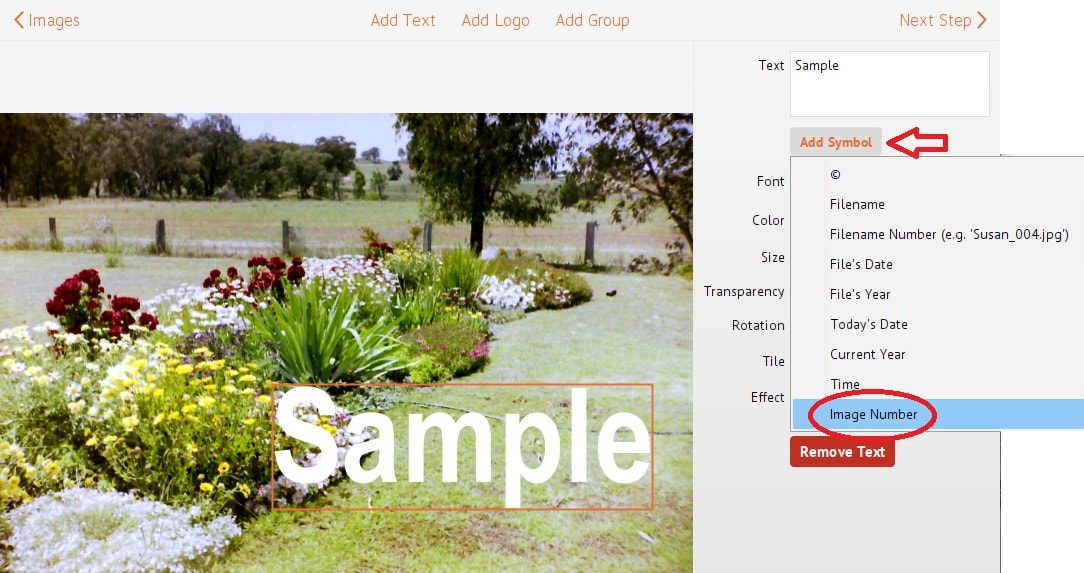
FIG 4 - Add Symbol, select Image Number
8. Number 1 will be inserted (start with any number you like). Remove the word 'Sample' (FIG 5 top pic)
9. Place the Folder number and a dash in front of the <number:1> (FIG 5 bottom pic)
9. Place the Folder number and a dash in front of the <number:1> (FIG 5 bottom pic)
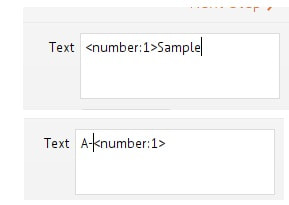
FIG 5 - Select a number for the first image, place the folder number in front, remove the sample text
10. Select an EFFECT to make the image name clearly visible (FIG 6), text size has been exaggerated for display, click next step
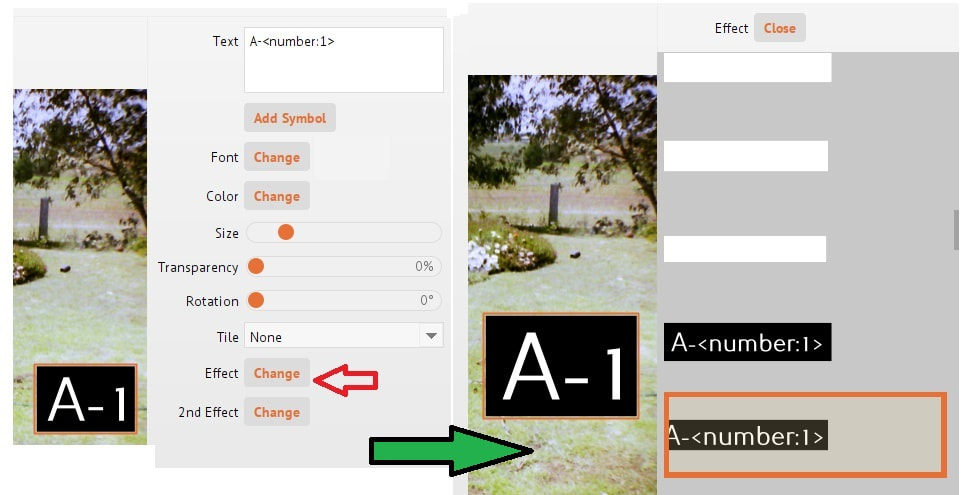
FIG 6 - Change the EFFECT to something that stands out
11. Select the output folder 'Folder A Watermarked'.
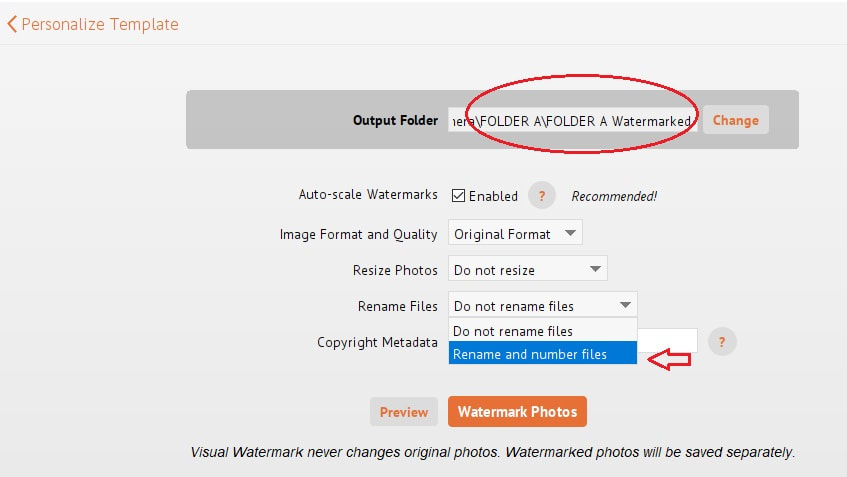
FIG 7 - Select the watermarked output folder and rename and number files
12. Select Rename and Number Files (FIG 7).
13. Choose a short name such as your initials then the name of the folder (FIG 8).
13. Choose a short name such as your initials then the name of the folder (FIG 8).
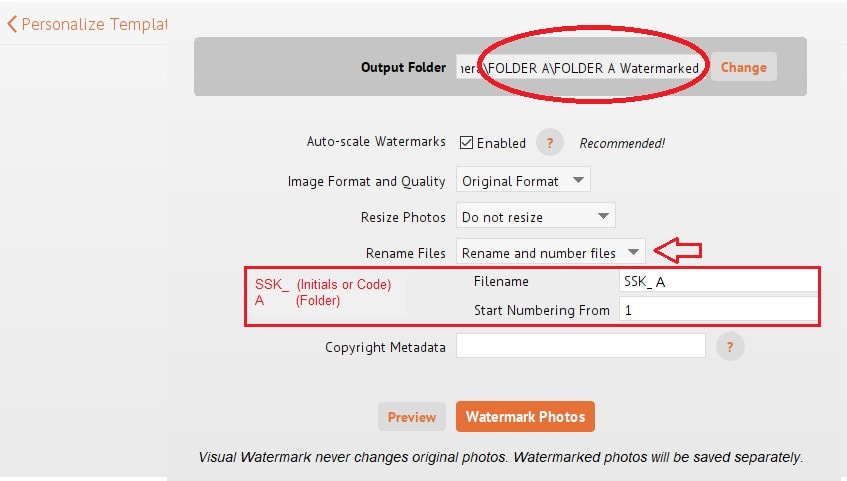
FIG 8 - Naming the new file
14. Watermark the images and open the output file to check them (FIG 9).
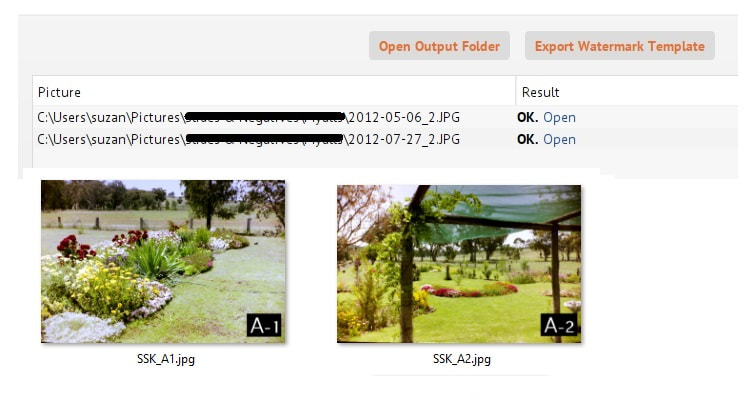
FIG 9 - Watermarked Images saved with file name
RENAME ORIGINAL FILES
To rename the files without the watermark change the Transparency to 100% (FIG 10).
Leave information the same (FIG 8). Select the output folder 'FOLDER A FILE-NAME Originals' (FIG 11).
Leave information the same (FIG 8). Select the output folder 'FOLDER A FILE-NAME Originals' (FIG 11).

FIG 10 - Use Transparency 100% .
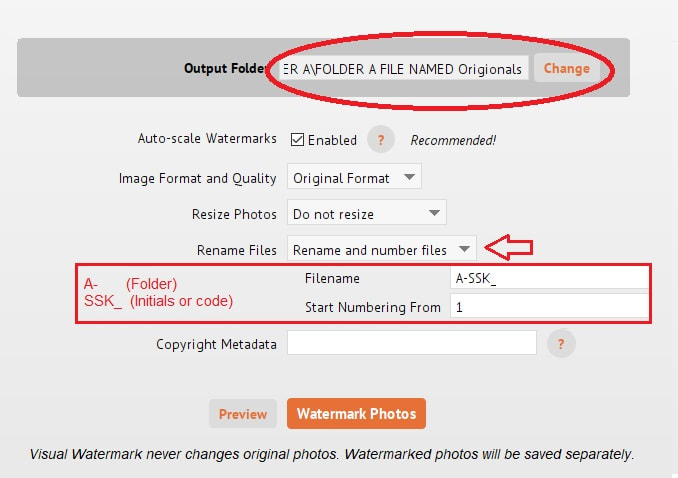
FIG 11 - Save images into 'FOLDER A FILE NAMED ORIGINALS'
Happy Watermarking! Thanks to Visual Watermark for a great basic product.
