Make your own Domain Name Email Addresses using live.com with Outlook
Purchasing a new domain name is exciting but there are downfalls when your registrar does not host email. An alternative is to use Google as your host but they are now charging $5 month for the service. Outlook.com is a free email service launched by Microsoft which you can use with your own domain name. Outlook.com can be very useful for professionals and website owners. In this article we will show you how to set up your own professional branded email address with Outlook.com. A professional email is the one that has your business name in it e.g [email protected].
The following method can be a little technically challenging, if you are looking for something simple click the link above to use your domain name with Zoho.
We need to configure your domain’s MX and TXT Records.
Step 1 Making MX and TXT Records
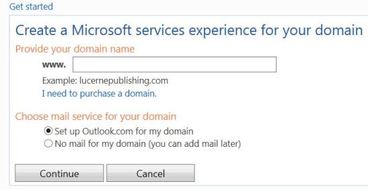
Go to https://domains.live.com/default.aspx and select "Get Started". You will be taken to the screen below.
The following method can be a little technically challenging, if you are looking for something simple click the link above to use your domain name with Zoho.
We need to configure your domain’s MX and TXT Records.
- MX records tell domain name servers that you are using Microsoft mail servers
- TXT records will be used to verify your ownership of the domain.
Step 1 Making MX and TXT Records
Go to https://domains.live.com/default.aspx and select "Get Started". You will be taken to the screen below.
Type your domain name in the space provided and select continue. (Make sure you have a current Microsoft account, if you do not the next screen shot is where you can make one).

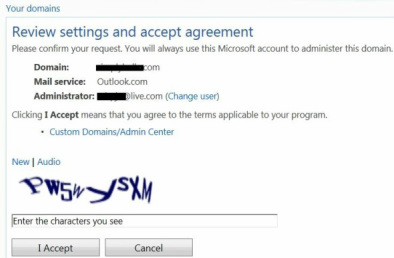
Fill out the captcha and select "I Accept". The next screen has TXT and MX Record information that you will transfer to your Domain Registrar to make new DNS Records.

TXT Record Information to be copied to Domain Registrar
Do not close the page. You are ready for the next step.
Step 2 Applying MX and TXT Records
You are now asked to make an MX record in your Domain Registrar with the information circled in red, in this case the Domain Registrar is Namesilo.
Step 2 Applying MX and TXT Records
You are now asked to make an MX record in your Domain Registrar with the information circled in red, in this case the Domain Registrar is Namesilo.
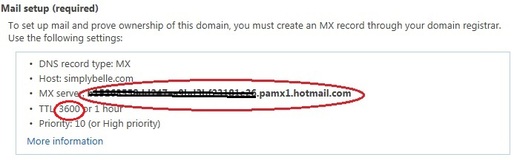
Fig A
Copy the information circled in Windows Live (Fig A) and insert into the space provided in the MX records in Namesilo (Fig B) below
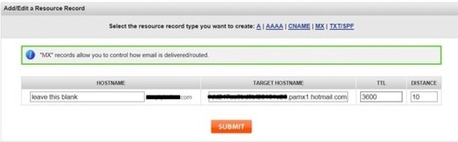
Fig B
Copy the MX Server information to the Target Host Name and follow the instructions for TTL & Distance. Leave the area in the Host blank as that information has already been written to the right of the box.
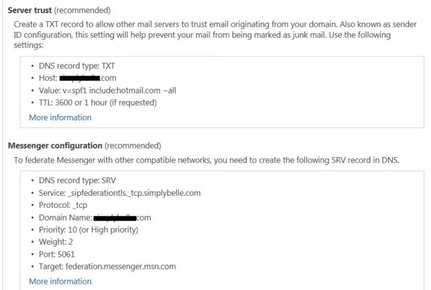
TXT Record Information to be copied to Domain Registrar
Follow the same procedure for the TXT Record and the SRV Record. If your Domain Registrar does not have the option to input a SRV Record do not worry as this WILL NOT affect your Email Service. There is no need to change registrars to one that supports SRV.
Save and close. Clear the cache. Return to Windows Live.
Step 3 Creating Email Accounts
Now comes the most frustrating and exciting part. Leave the page open and give the records time to configure. Do not close the Tab. In approximately 2 hours click the Refresh button. If nothing has changed leave it for another 2 hours. Do not become frustrated. Eventually you will receive the screen below.
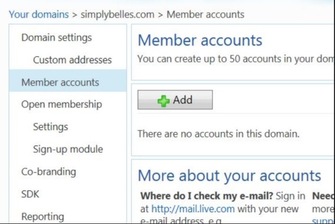
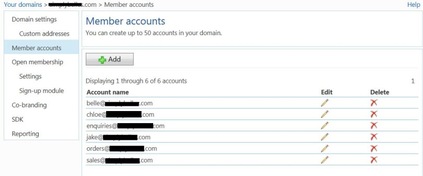
You can now add email accounts. A new screen will ask for "Account Name" this might be "contact or sales". "First Name" & "Last Name" is what will precede your email address. Fill in one or both with what ever you choose. Choose a simple temporary password like 123456 as you (or your client) will be prompted to change your password at first log in.
Sign into your new email at http://mail.live.com using your temporary simple password and follow the prompts to activate your new email.
Your account now appears to be ready for use but there is one last step. You need to add your new domain email account to Outlook because you will get errors if you try to use your new account as it is.
How to Add Hotmail/Live.com Email Account to Outlook
To configure your new domain email account correctly go to Windows 7 Start Button and type in "Mail". Click on Windows Live
Mail. Click the down arrow in the top left corner. The following screen will pop up.
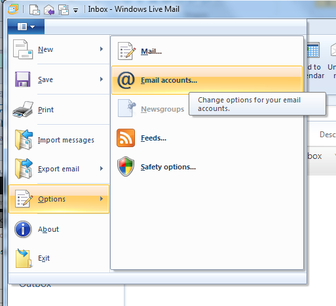
Select Options and Email Accounts
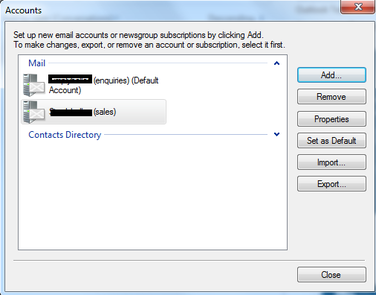
Click "Add". The following screen will pop up.
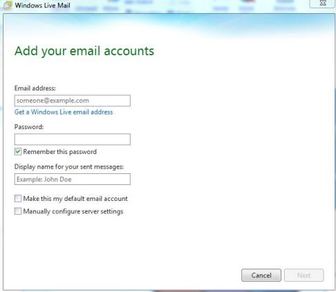
At the next screen fill out the Email Address and the Password for your recently made account. The Display Name can be of your choosing. Leave the bottom two boxes blank unless you require this email to be your default account. Click Next.
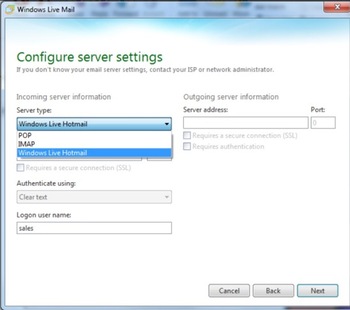
In the Configure Server Settings window choose "Windows Live Hotmail". Leave everything else blank. Click Next. Then click Finish.
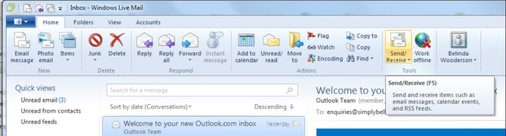
Your Email Account has been configured successfully with Outlook and is ready for use. Some a test email to yourself. Be sure to click "Send & Receive" when you are waiting for your reply.
Your Email Account has been configured successfully with Outlook and is ready for use. Some a test email to yourself. Be sure to click "Send & Receive" when you are waiting for your reply.
One last thing to remember BE SURE TO PERIODICALLY LOG INTO YOUR WINDOWS LIVE EMAIL ACCOUNT AT http://mail.live.com. If you do not do this you run the risk of your account being seen as inactive and thereby deleted. Logging in every few months should solve this problem.
